Drywall is one of the modern building materials, the characteristic feature of which is the composition of the properties of various substances in one complex. The combination of multidirectional properties of the source materials in a single product allows you to get results that are unattainable when using these materials separately.
Gypsum plasterboards (GKL) is a material, when used properly, that gives a significant gain in the speed of finishing works and in the ease with which it allows to obtain ideally smooth surfaces. Some information about drywall work will help to avoid mistakes and make work easier and more enjoyable.
Fact 1
Drywall was invented to increase paper sales.
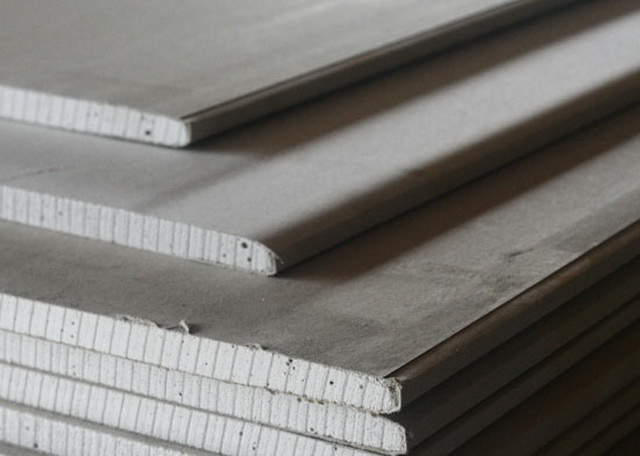
Photo: board.kompass.ua
Drywall was invented in 1884 by an American, Augustine Sackett, the owner of a paper mill. The search for new applications and markets for its products has led to the birth of a new material.
The prototype of modern drywall consisted of ten layers of thick paper, glued together with gypsum. Subsequently, Stephen Kelly simplified the structure of the material, using a solid gypsum core and a two-sided paper shell. Clarence Ustman owned the idea of the closed edges of the sheet. In this form, drywall has reached our days, without undergoing fundamental changes.
Fact 2
Drywall, like any material, has its own scope.
If you have an idea to level the walls or ceiling with the help of drywall, you should evaluate the degree of surface roughness. This material is most effective in aligning large irregularities and setting false walls, partitions and other structures. If the irregularities are small, the use of drywall can lead to unnecessary time and money. In addition, when using it as a “dry plaster”, it should be remembered that the plasterboard plating inevitably takes up some room space, which in some cases can be quite significant.
Fact 3
When plastering walls with plasterboard, sheets can be fixed with glue.
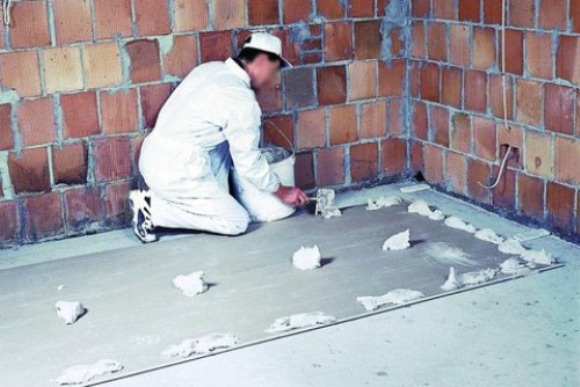
If it is necessary to plaster a wall with plasterboard, the irregularities of which do not exceed 20–50 mm, the sheets can be fixed to a special adhesive, for example, the plaster adhesive mixture “Perlfiks” manufactured by Knauf. The mixture is applied on the back side of the sheet with three vertical stripes using a scoop with a “chipped” edge. With very smooth walls, you can also use a comb spatula.
If the irregularities exceed 20 mm, the glue is applied in lumps with dimensions of about 15 cm. Lumps are arranged along the vertical edges and along the middle line of the sheet approximately 25 cm in height. In case of very large irregularities of the wall, they can be compensated by pasting drywall strips in these places on the wall.
When working with glue, it is important to remember that it remains functional within 30 minutes after preparation. You need to prepare the mixture in such quantity that will be used during this time.
The correctness of laying sheets checked line (rightandscrap) 2.5 m long. The sheet protruding above the plane should be “planted” by knocking it with a rubber hammer through the rule.
Fact 4
Fastening drywall sheets to metal profiles with self-tapping screws does not require prior drilling.
To a person who is accustomed to working “by the rules”, the idea of screwing screws into a smooth metal without holes may seem, to put it mildly, strange. However, metal screws used in drywall works after several revolutions of the “slip” independently make a hole in the profile and enter it, fastening securely.
Do not attempt to perform such an operation manually. To do this, use a screwdriver or drill.For mounting drywall used black screws with a countersunk head and fine thread, securely holding in a thin sheet metal.
Fact 5
The fastening of the frame elements among themselves has its own characteristics.
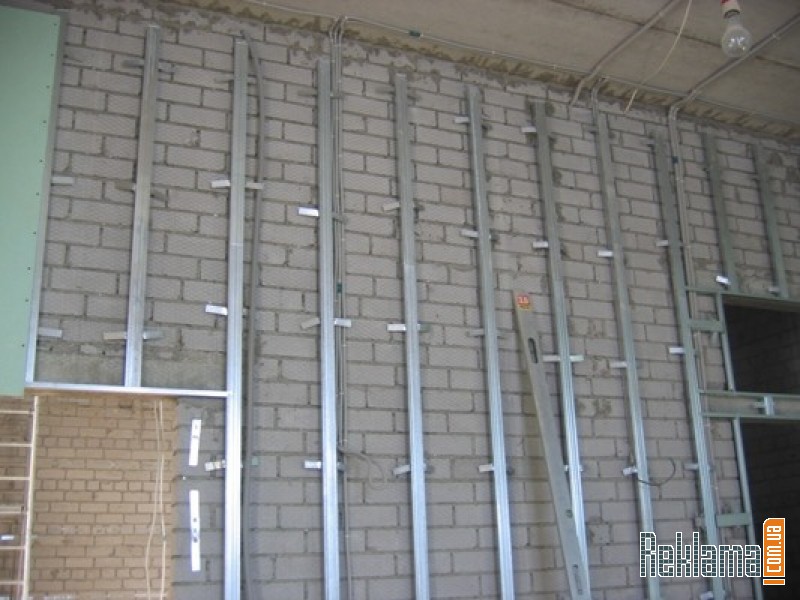
Photo: stroim-vmeste.ucoz.ru
To connect the elements of the metal frame between them, there is a special tool that resembles tongs. The work of this tool is that with its help two parts (profiles) are pressed tightly to each other, then a hole is punched in their walls, the edges of the metal in it are bent and the details are fixed. It turns out a kind of riveted connection that does not require any fasteners.
However, most builders prefer to use for mounting all the same screws. Such a connection is unreliable for several reasons and can lead to a gradual loosening of the attachment points. If you already use screws, you should prefer the option with a drill and a semi-circular or hex head with a press washer. Such a self-tapping screw tightly presses fastened parts and holds more securely.
Fact 6
A drill is not worse than a screwdriver.
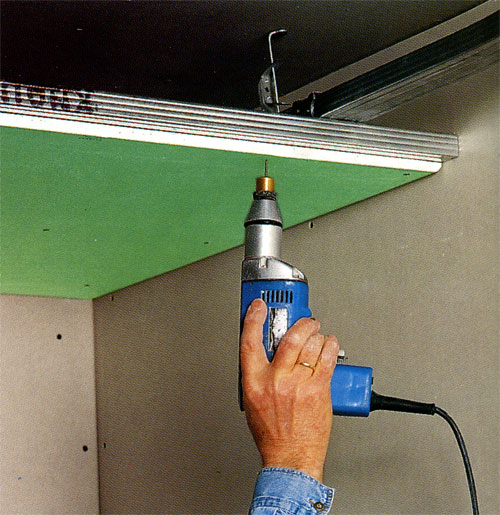
If you do not have a screwdriver, you can replace it with an electric drill. Screwing screws with a drill is not so convenient and requires certain skills. But in the case of fixing the gypsum board, a special bit-bit helps a lot with the work.
The drywall bit is a regular PH2 bit with a limiter mounted on it. When screwing in, the stopper abuts against the surface of the drywall and the screw head is recessed flush with the surface. It does not need to control the rotation speed and torque.
Fact 7
Bit - one of the important little things.
Bat, that is, the nozzle, which directly turns the screw - quite an important part of the equipment when working with drywall. Mounting the frame and sewing sheets, you have to screw in thousands of screws. Under these conditions, the correct bit can have a significant impact on the speed of work and on the amount of effort expended.
First, the bits must necessarily correspond to the splines of the screw, both in size and type. When installing drywall constructions, screws with a diameter of 3.5 mm with simple cross-shaped slots are usually used. The PH2 bit is intended for them. If self-tapping screws with eight-beam slots are used (they are usually yellow or white), then it is better for them to stock up on PZ bits of the appropriate sizes.
Ideally, the screw, mounted on the bat, should be held tightly on it. A magnetic holder is very helpful in working with self-tapping screws - an intermediate link between the drill or screwdriver chuck and the bat. Checking the quality of the holder when buying is simple: you need to install any bat in it and “dip” it into a pile of self-tapping screws. If after that only one of them was kept on the bit, it is better not to use such a holder. A good magnet should hold at least three.
Fact 8
The edges of the drywall sheet have a special shape for high-quality sealing of the joints.
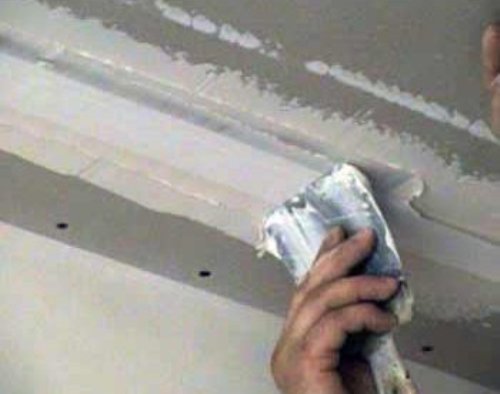
Photo: dleamasterov.ru
GLC longitudinal edges have a special shape. The bevelled semicircular edge facilitates high-quality filling of the joint with putty. The reduced thickness of the sheet near the edge makes it possible to lay a reinforcing tape on the joint so that it does not create a bulge in this place.
With longitudinal, that is, vertical joints, everything is more or less clear. But how to close up the joints transverse, inevitable when the height of the wall exceeds the length of the sheet?
First, the cross seams need to be done "in a run", so that they are located on adjacent panels at different heights.
Secondly, the horizontal edges of the sheets, unlike the vertical ones, are not fixed on a rigid base along the entire length and can fluctuate. To fix the edges, you need to hem the profile pieces, 15-20 cm long, across the joint from the inside. There should be two such reinforcements to the width of the sheet.
Thirdly, the seam edges must be opened to a depth of at least half the thickness of the sheet, removing the material along the edge at an angle of 45 °.Next, you need to remove the cardboard wrapper of the sheet along the edge of the width, which will take the reinforcing tape.
After this, the joint is sealed with Fugenfuller (Fugenfüller) or Uniflott (Uniflot) putty, as well as vertical. Despite the fact that Uniflott putty is intended for sealing joints without using tape, it is better to use it at transverse joints, as they are less stiff and the probability of cracks here is higher.
Fact 9
The location of the fasteners on the sheet is strictly regulated by the manufacturer GKL.
When attaching a sheet of drywall to the frame, the screws are arranged in a specific order:
- along the edge of the mounting screws are located at a distance of about 20 mm from the edge with a pitch of 125 mm;
- the sheet is attached to the middle profile along the center line of the sheet with a pitch of 250 mm;
- on the face of the plasterboard marked marks at the points where you need to put fasteners;
- when attaching edges that are not covered with cardboard (transverse joints, joints of cut fragments), self-tapping screws should be placed further from the edge, since the open edge has less strength.
Fact 10
Plasterboard should not rest on the floor.
Regardless of the method of fixing gypsum sheets, the sheets are installed in the same place:
- the sheet is laid on the floor with its face down and bottom end to the place of future installation;
- the bottom edge is laid on the liners with a thickness of about 10 mm, usually for this use drywall trim;
- necessary preparation is carried out, for example, putting glue;
- the sheet rises in a vertical position and is set in place, while it must necessarily stand on the liners;
- after the final fastening of the sheet inserts are removed.
The gap will protect against unpleasant consequences that may arise when a structure sags during operation.
Fact 11
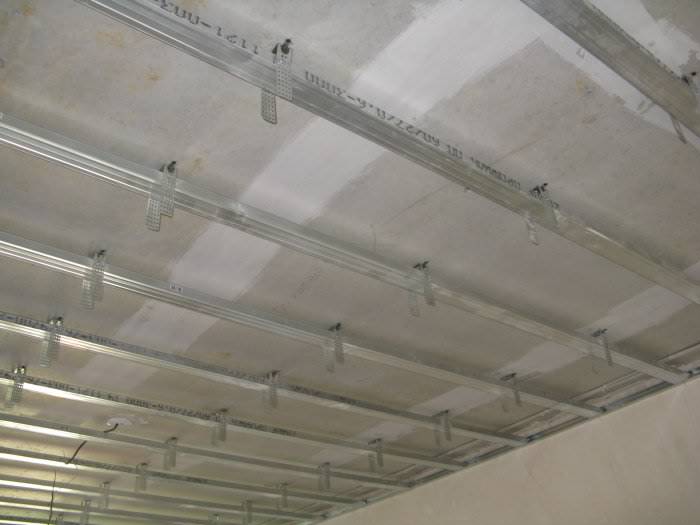
The framework for the suspended ceiling of plasterboard is different from the framework of the walls.
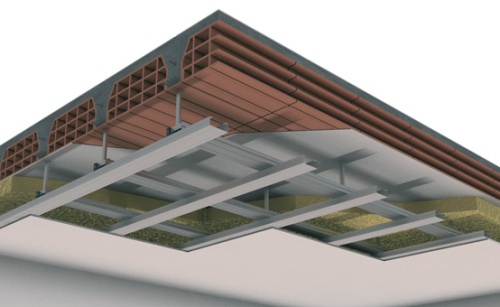
Photo: gipsari.com
When installing vertical plasterboard surfaces, each sheet is attached to three profiles: two at the edges, common to adjacent sheets, and one in the center. With a sheet width of 1200 mm, the pitch of the vertical profile of the frame is 600 mm.
When installing drywall on the ceiling, higher demands are placed on the frame. To ensure sufficient strength and to eliminate sheet sag, the ceiling frame is mounted in 400 mm increments. That is, each sheet keeps for four profiles.
Often, builders neglect this requirement and make the ceiling frame the same as the wall, saving the profile. However, in this case, no one can guarantee a flawless ceiling service.
Fact 12
There are special requirements for ceiling fittings.
Of fasteners designed for mounting in brick, concrete, etc., the most common plastic dowels, which are screwed into the screws. However, in the case of mounting a suspended ceiling, their use is unacceptable.
In the ceiling mount, in contrast to the wall mount, the fastener does not work for “breaking”, but for “tearing”. Plastic dowel can begin to "crawl" under load. Well, if a fire happens, the ceiling, mounted on thermoplastic fasteners, can become worse than the fire itself.
To fix the ceiling to the base it is better to use percussion metal dowels, wedges or anchor bolts.
Fact 13
Do not save on the rigidity of the partition from drywall.
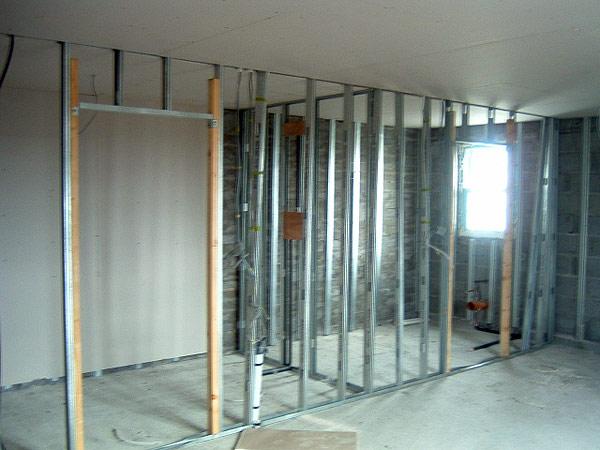
Photo: nashakrepost.ru
When redeveloping the apartment is very convenient partitions from gypsum. The skeleton of steel vertical profiles is sheathed on both sides with plasterboard, the internal cavity is filled with soundproofing material - and the wall is ready!
However, there may be an unpleasant surprise. The entire partition is attached to the floor, ceiling and walls. In essence, a membrane is obtained that is capable of vibrations with all the ensuing consequences. In order to not get a huge drum instead of a wall, you need to take care of the rigidity of the frame in advance. To do this, you can:
- minimize the length of the free partition, build the layout so that the partition is reinforced with an angle, adjoining another partition and other stiffening ribs;
- apply to the frame profile of the maximum section;
- introduce reinforced profiles to the frame for door installation;
- increase the mass of the partition by completing a two-layer plasterboard plasterboard.
Fact 14
The junction of the plasterboard partition with the wall, floor or ceiling is a potential hole in the adjacent room.
The joint of plasterboard walls with other structures, despite its apparent density, is an open window for heat leaks and sound penetration. No matter how carefully the installation is carried out, a through slot is formed in this place from one room to another.
In order to eliminate the appearance of this defect, a special strip of foamed rubber is placed under the adjacent profile. Elastic gasket tightly fill all the irregularities and seal the joint. Foamy structure will absorb sounds and retain heat.
Fact 15
Attach something to the plasterboard wall must be prudent.
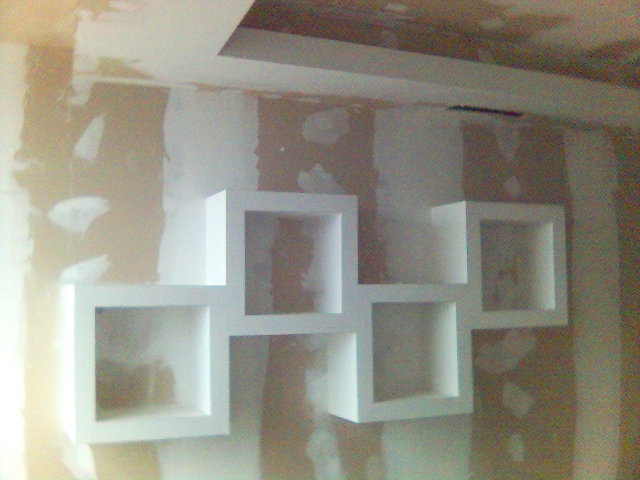
Photo: obystroy.ru
Shelves, cabinets and even quite heavy cabinets can be mounted on the wall of plasterboard. The main thing is to use special fasteners for this and correctly place the attachment points.
However, if you need to fix a heavy object that gives a high load, for example, a boiler, then it is better to position the fasteners so that the load falls not on the sheet, but on the power elements. It is best to lay the gain in the desired location at the stage of building the frame.